Crushing My One-Mile Benchmark on the Peloton Tread: 5:25 (With an Unexpected Twist!)
Have you ever accomplished something amazing despite a mistake that should have derailed you? That’s exactly what happened during my latest one-mile benchmark test on my Peloton Tread.
Table Of Content
- The Accidental Challenge
- Why Metrics Matter on the Peloton Tread
- Understanding Peloton’s Pace Target System
- How Your One-Mile Time Determines Your Level
- The Complete Pace Target Guide
- Making Pace Targets Work for You
- How My Training Has Evolved with Metrics
- Lessons from My Accidental Challenge
- What’s Next on My Peloton Journey?
- Your Turn: Finding Your Pace Targets
The Accidental Challenge
As I started my first-ever benchmark test before beginning Power Zone training, something felt… different. The effort seemed harder than it should have been, but I chalked it up to just having an off day. We all have those, right?
Halfway through, while adjusting my form, I glanced down at the screen and nearly stumbled. The incline was set at 2% instead of the standard 1% for benchmark tests!
In that split-second, I had a choice to make: stop and restart with the proper settings, or embrace the challenge and see what I could do.
I chose to power through.
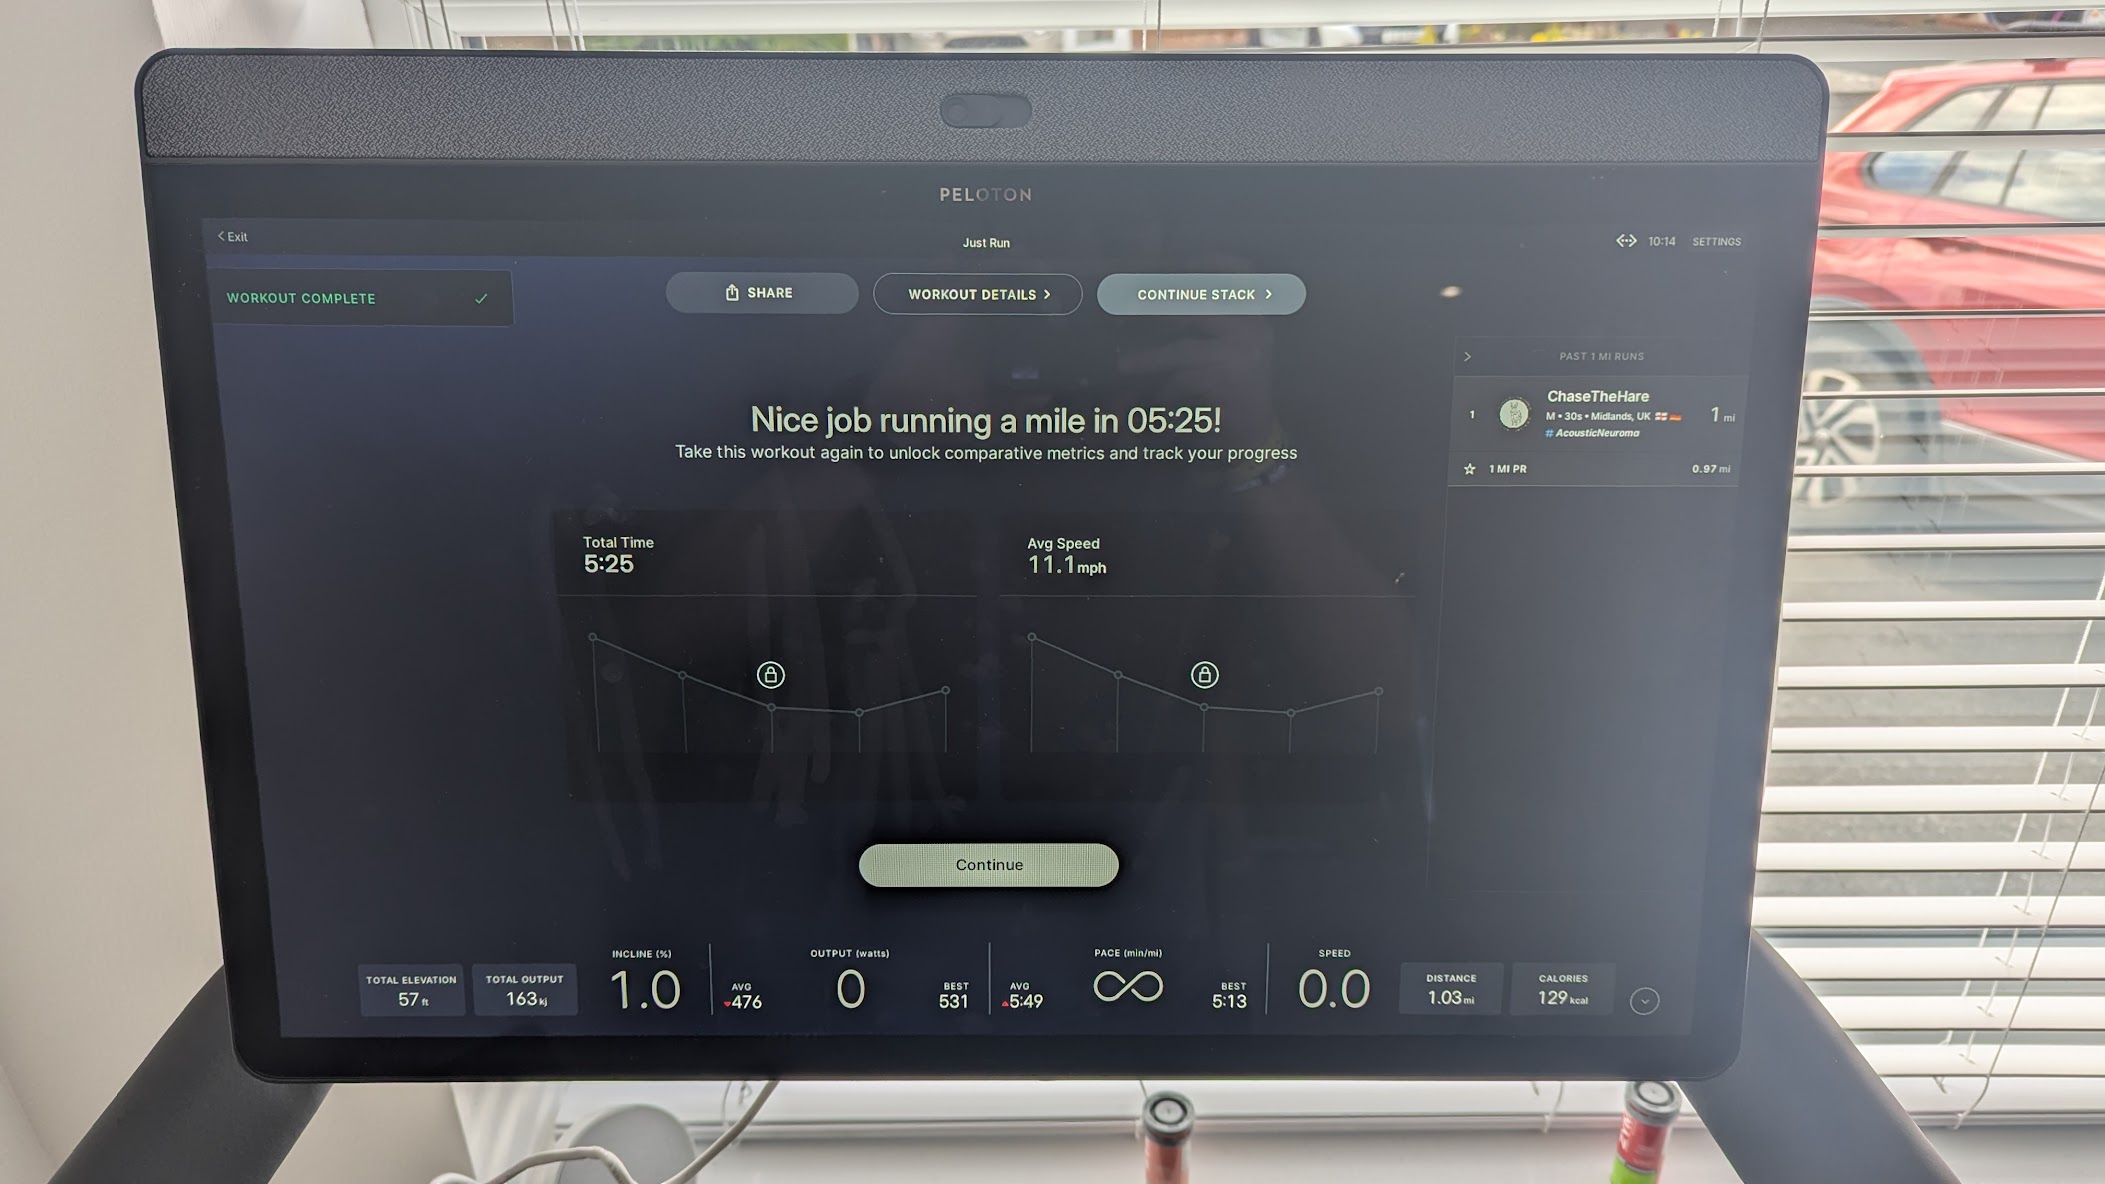
When the final numbers flashed on the screen—5:25—I felt a wave of accomplishment wash over me. Not only had I achieved a personal best, but I’d done it with an extra handicap! Talk about a confidence boost.
Why Metrics Matter on the Peloton Tread
One of the things I’ve grown to love about my Peloton journey is the evolution of how we train. Remember when everything was based on Rate of Perceived Exertion (RPE)? Those days of “on a scale of 1-10, how hard does this feel?” have largely been replaced with something far more precise.
Peloton’s shift to metrics-based training has revolutionised how I approach each workout. Instead of guessing if I’m working hard enough, I now have concrete numbers to aim for:
- Speed (mph/kmph): My real-time pace that helps me gauge my effort level
- Incline (%): The treadmill’s slope that mimics outdoor terrain challenges
- Cadence (spm): My steps per minute—a crucial metric for running efficiency
- Output (watts): The holy grail metric combining speed and incline to show total work
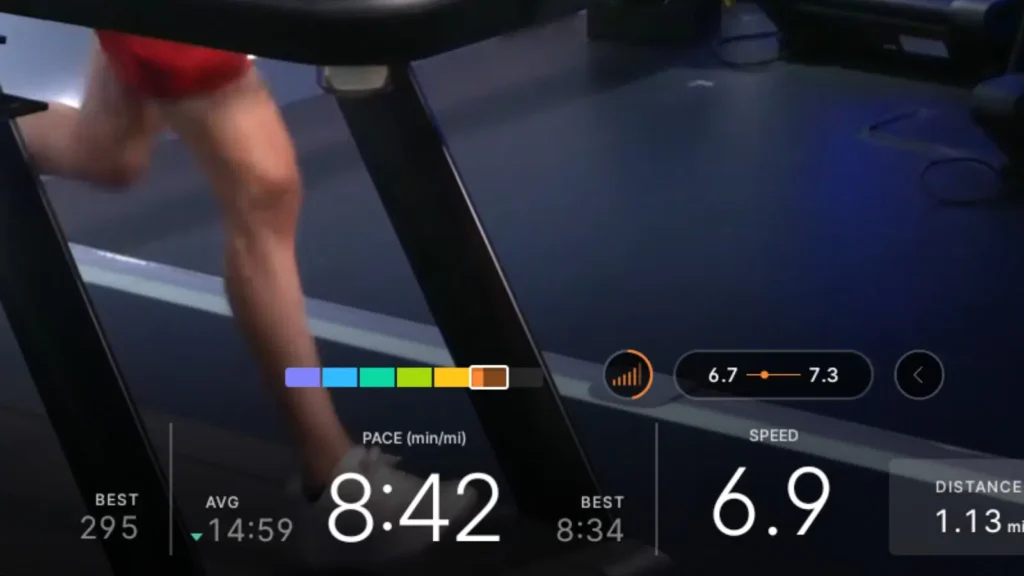
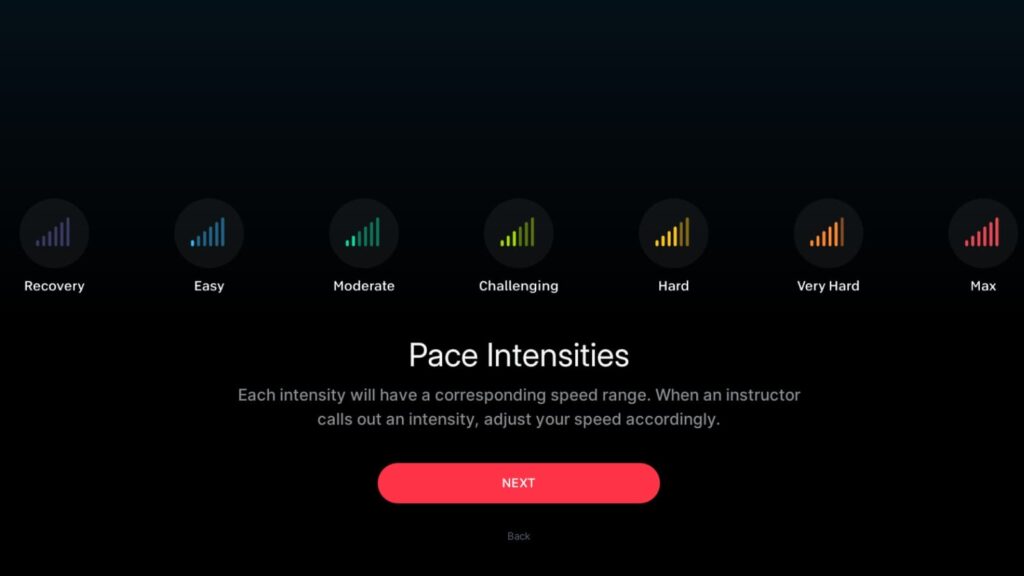
These aren’t just numbers on a screen—they’re my roadmap to improvement. When an instructor calls out “Let’s move into your Moderate zone” or “Push into your Hard zone for 30 seconds,” I know exactly what speed range to hit based on my level. No more guessing if I’m working at the right intensity—the metrics tell me precisely where I need to be for my fitness level.
Understanding Peloton’s Pace Target System
Something I wish I’d understood better when I first started was Peloton’s comprehensive pace target system. It’s designed to meet you exactly where you are in your fitness journey.
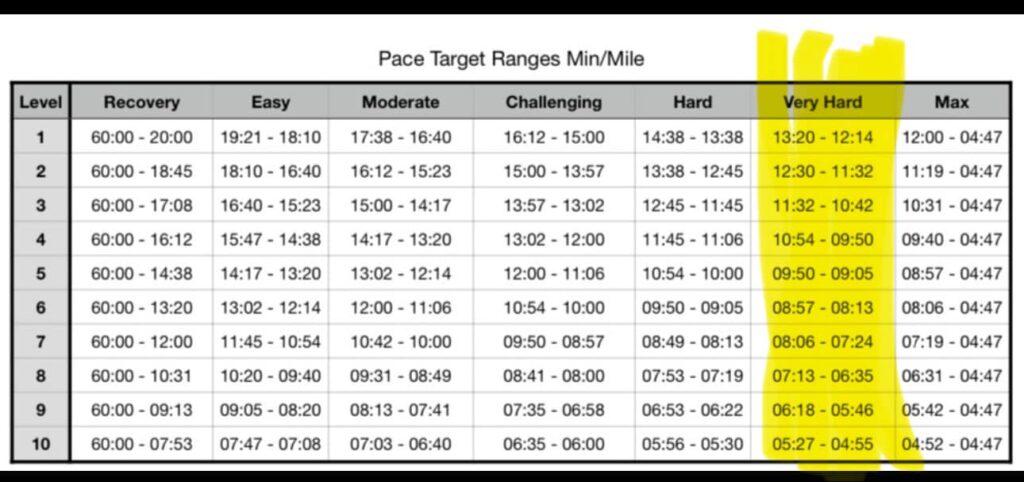
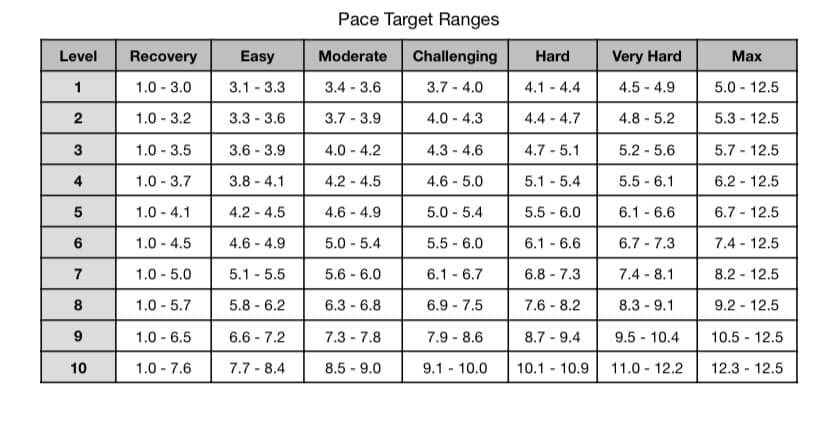
Your running level is determined by your one-mile benchmark test, and it dictates the pace ranges you should aim for during different workout segments. At Level 10 (where my 5:25 mile puts me), my targets look quite different from someone just starting their journey.
How Your One-Mile Time Determines Your Level
Before diving into the pace charts, let’s understand how Peloton assigns running levels:
- Level 1-3: Newer runners or those building back from injury (typically 10:00+ minute mile)
- Level 4-6: Intermediate runners (typically 8:00-10:00 minute mile)
- Level 7-8: Advanced runners (typically 6:30-8:00 minute mile)
- Level 9-10: Elite runners (typically sub-6:30 minute mile)
My 5:25 mile places me at Level 10, which comes with both pride and the responsibility to push harder in every class.
The Complete Pace Target Guide
Here’s the full breakdown of Peloton’s pace targets by level. Find where you fit and use these ranges as your guideposts during classes:
Making Pace Targets Work for You
The beauty of this system is its scalability. Here’s how I use these pace targets in my training:
- For endurance runs: I stay in the “Easy” to “Moderate” ranges (7.7-9.0 mph for my Level 10), focusing on maintaining form and breathing rhythm.
- For interval training: I alternate between “Recovery” periods (usually around 7.0 mph for me) and “Hard” or “Very Hard” pushes (10.1-12.2 mph).
- For progressive runs: I start in the “Easy” range and gradually increase through each zone, finishing with a “Very Hard” effort.
- For benchmark tests: I aim for the high end of my “Very Hard” range, knowing I can sustain it for shorter periods.
What’s fascinating is how these targets adjust over time.
How My Training Has Evolved with Metrics
Since embracing Peloton’s metrics-based approach, my training has become more purposeful. Instead of randomly selecting classes based on music or instructor personality (though those are still factors!), I now plan my week around specific targets:
- Mondays: Recovery runs (keeping in the “Easy” zone)
- Wednesdays: Speed intervals (pushing into “Very Hard” for short bursts)
- Fridays: Threshold runs (sustaining “Challenging” to “Hard” paces)
- Sundays: Long, steady runs (maintaining “Moderate” pace)
This structure has eliminated the guesswork. When Rebecca Kennedy calls for a “Hard” effort in her HIIT class, I know exactly what numbers to hit on my screen.
![Weekly training calendar showing different types of Peloton runs]
Lessons from My Accidental Challenge
My incline mishap taught me several valuable lessons:
- Always check your settings. Seems obvious, right? But in the excitement of starting a benchmark, I skipped this crucial step.
- Mental strength matters as much as physical. Continuing despite realising my mistake was a mental victory as much as a physical one.
- Embrace unexpected challenges. That extra 1% incline might have been the very thing my training needed.
- Trust the data. The metrics don’t lie—they showed me exactly how my performance was affected by the incline change.
What’s Next on My Peloton Journey?
With this 5:25 mile now in the books, I’m setting my sights on breaking the 5-minute barrier. My training plan includes:
- More threshold runs to improve my lactate tolerance
- Dedicated hill workouts (now purposely using that 2% incline!)
- Speed intervals focusing on maintaining form at higher speeds
- Recovery runs to build my aerobic base
And of course, another benchmark test in about 8 weeks—this time with the proper settings checked twice!
Your Turn: Finding Your Pace Targets
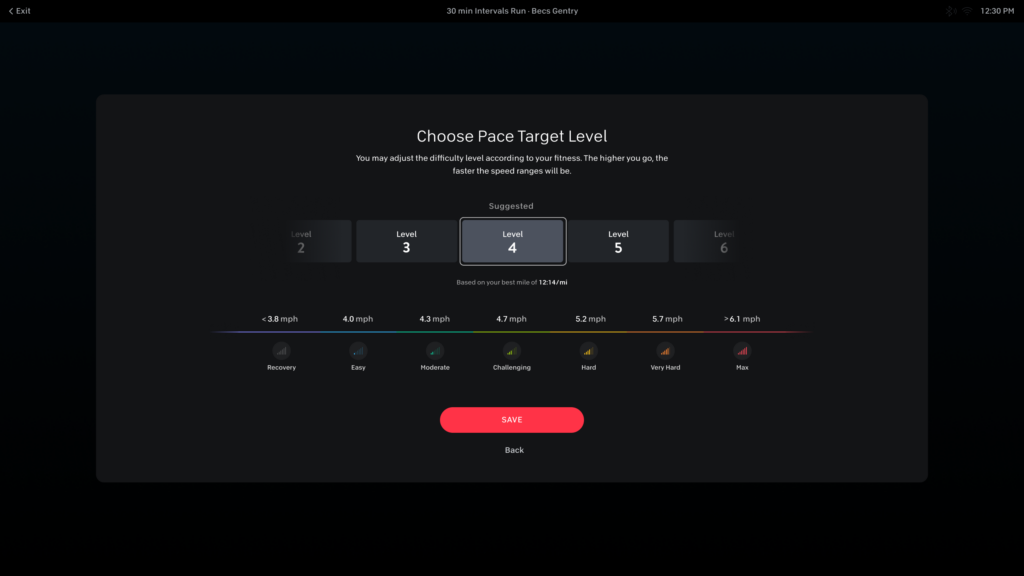
If you’re new to the Peloton Tread, here’s my advice for making the most of the pace target system:
- Take the benchmark test. It’s the only way to accurately determine your running level.
- Be honest with yourself. Don’t try to force yourself into a higher level than you’re ready for—the system works best when you start at your true ability.
- Trust the process. Follow the pace targets for your level, even if they seem too easy or too hard at first.
- Reassess regularly. Plan to retake the benchmark every 6-8 weeks to track your progress.
- Focus on form before speed. Better to run properly at Level 4 than injure yourself trying to hit Level 7 numbers.
To determine your Pace Target Level, refer to your fastest mile time and match it to the corresponding time range in the table. Use this as a guide to understand your training zones and ensure you’re working at the right intensity for each effort level.
